Automation is a great tool in Logic Pro for creating specific changes to specific parameters. There are a few ways of writing automation into a track and it does not stop there; there is a lot more to it even after it has been written. Imagine, for instance, that you have created automation in one of your project’s tracks and decide that the automation needs to be in sync with the beat of your project. In this Logic Pro automation tutorial, we will look at how to quantise automation after it has been written.
Enable the Automation View
Before you start working with automation, you need to make sure that you are able to see automation in Logic Pro by pressing A on your keyboard or by clicking the Automation button on Logic’s toolbar. This allows you to see the automation that has been written into the track.
For example purposes, the image below shows two layers of written automation: volume and pan. Notice that the nodes for the automation were created randomly, which, for most of us, is usually the way automation is created to start with.
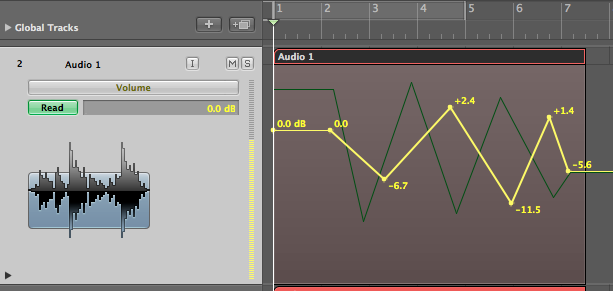
Notice how the nodes in this automation example fall in random places of the region. Let’s start by discussing how to correct one of the nodes (or a couple of them) at a time to fall exactly on a beat.
Snap Automation to the Beat
The first way of quantising automation is by using the Snap Menu on Logic Pro’s Arrange window local menu bar. As you may know, from that Snap Menu, you can choose a value so that when you drag elements in the Arrange window they will lock to the value that you have set.
However, if you click on the Snap Menu and set it, for instance, to snap to the beat and drag one of the Automation nodes, you may notice that the node will not be snapping to the beat. The reason for this is that there is an extra option on the Snap Menu that needs to be ticked: Snap Automation. You find this option at the bottom part of the Snap Menu.

Once you have checked the Snap Automation choice, you can grab an automation node and see that it will snap to the beat as you drag it.
This is a very efficient way of quantising one (or a few) automation nodes. However, if I wanted to quantise all of my automation, including volume and pan, having to drag one node at a time will become a tedious, time-consuming, unnecessary task. Thus, the need for an easier, faster way of manipulating multiple layers of automation at once.
The Automation Event List
The Event List is a great place to perform many kinds of editing at once. You can access the Event List by clicking on the Lists button on the right hand side of Logic’s Toolbar.
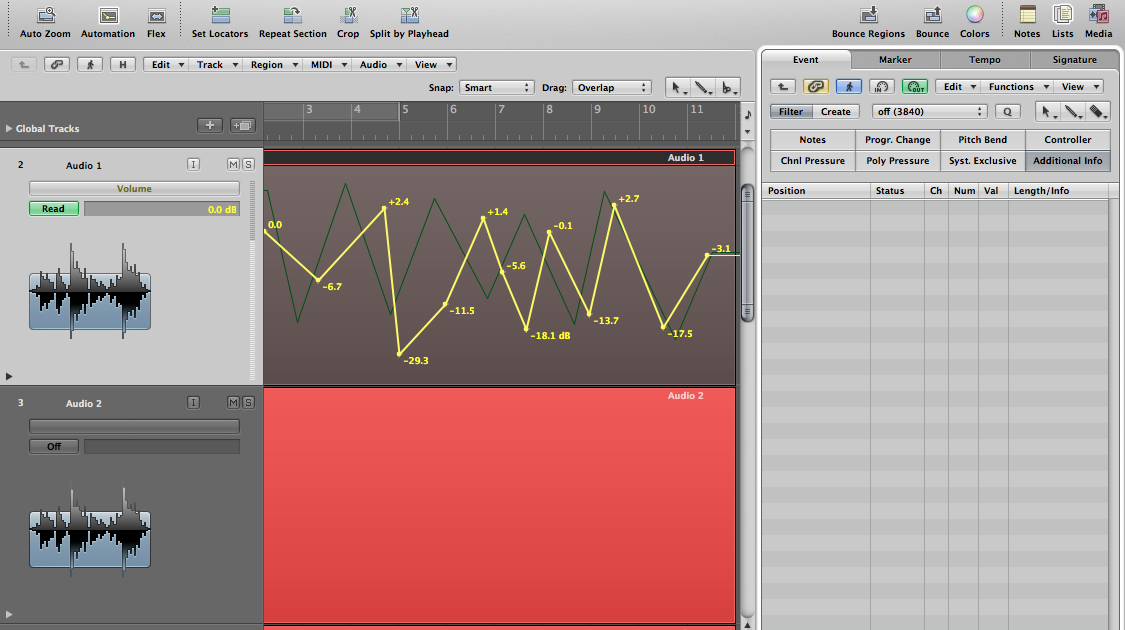
The problem is that the Event List only looks at the contents of regions and Automation is not contained within a region but is rather more like a layer on top of a region. Therefore, when you look at the Event List no Automation info is displayed.
In the image below, the Event List is empty because the selected is empty. Even though there is Automation on that track, no info is displayed on the Event List.
Something a lot of Logic users do not know about is that there is actually an Event List designed specially for automation. You can get to it by going into Logic’s Key Commands window. As you type ‘auto’ in the search field of the Key Commands window find the Automation Event List key command. You can set up a key command for it if there is none. Use that Key Command and the Automation Event List will pop up on screen.
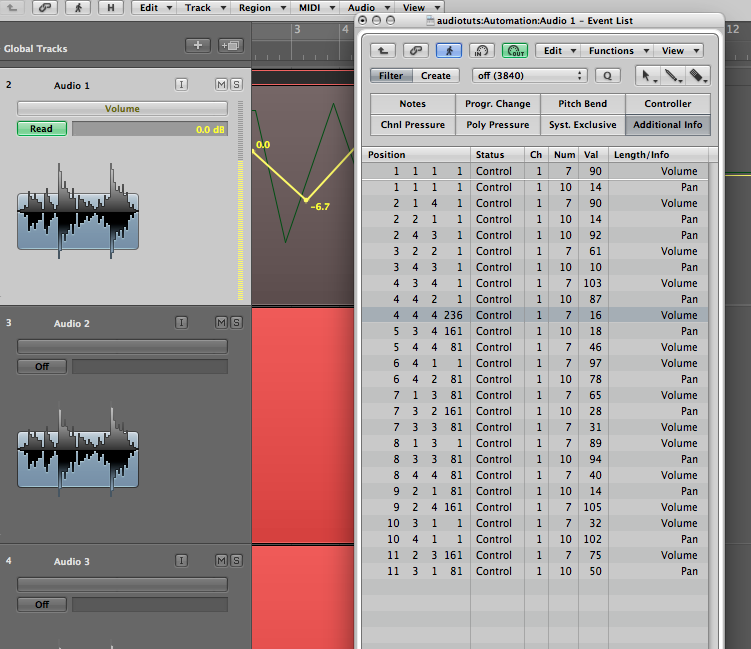
Notice that the Automation Event List contains all of your Automation info for the selected track. It is also important to notice that it does not include all the Automation info for all of the tracks in the project, only for the selected track.
Quantise Automation
Now that we are ready to quantise our automation, the first thing to know is what Automation layer (or layers) we want to quantise and how to select them in the Automation Event List. Let’s assume, for example, that we want to quantise the panning. The best way of selecting it is by clicking on one of the Pan events in the Automation Event List, then going to the Edit menu and choosing Select Similar Events, located towards the bottom of the menu.
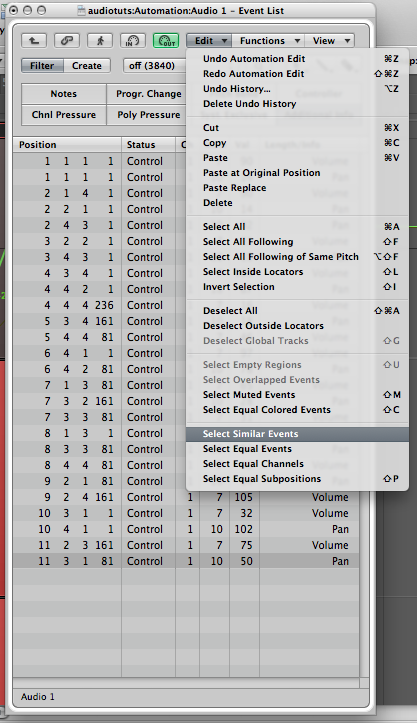
As you can see, all of the pan events will be selected in the Event List and the nodes will be selected on the Arrange window.
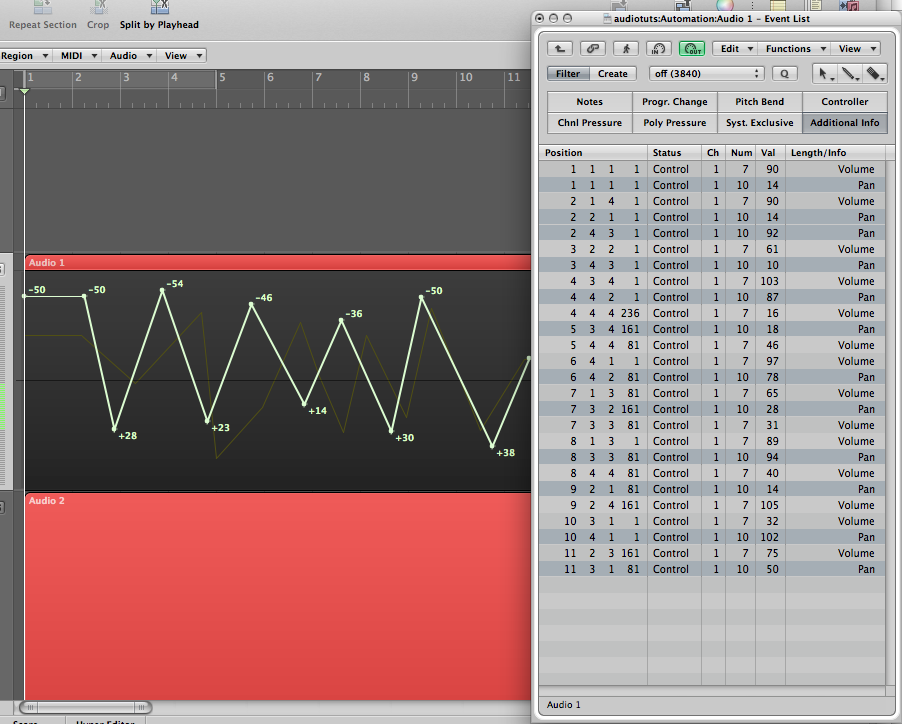
Once you have all of the events selected you can quantise them to the value you want. In this example I’d like the nodes to be right on the bar so I chose to quantise to the whole note. Notice that now all of the nodes for panning fall exactly on the beat, right on the bar.
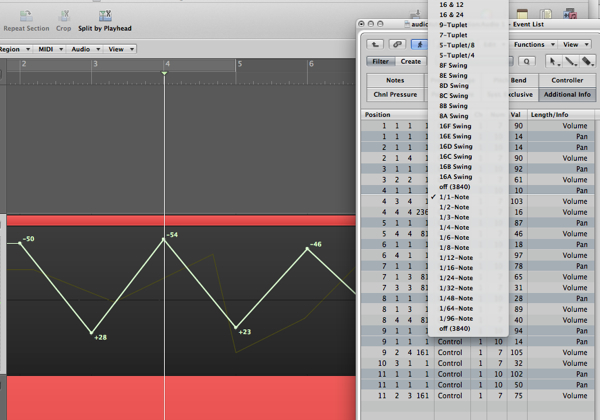
You are not limited to quantising using the Automation Event List, there are a lot of editing options including volume, position, etc. Imagine the options that open up when you start using this kind of editing with all kinds of Automation like delay times, echoes, distortions; the possibilities are endless.
Enjoy!

