Creating drum sounds from scratch can not only be gratifying, but can help to teach the fundamentals of synthesis. In this Ableton Drum Synthesis Tutorial we take a deeper look. With heavy emphasis on ADSR, waveform selection and filtering, here are 3 drum sounds you can re create with Ableton’s Operator Synth and some drum synthesis techniques.
The Kick Drum
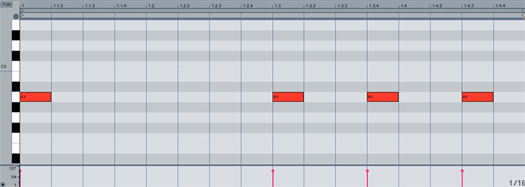
Before we start tweaking knobs on Operator, lets program a simple 1 bar kick pattern.
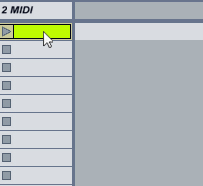
Enter session view and double click the first open clip slot on a MIDI track.
Locate the piano roll window that has opened on the bottom section of Ableton Live.
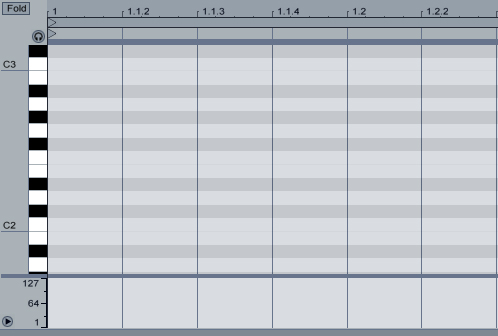
Enter a simple MIDI sequence by double clicking the in the grid.
For better control, zoom in or out horizontally by clicking and dragging up or down over the beat ruler. Zoom vertically by clicking and dragging left or right to the left of the black and white keys.
Programming The Kick Drum Sound
Time to start shaping the kick sound, drag an Operator synth over to the MIDI track. You can hit play on the MIDI clip we’ve created if you would like to hear the sounds being molded in real time.
Set OSC A’s Coarse knob to 0.5.

With OSC A still selected, locate Operator’s middle panel.

In the middle panel, change the release value to 1.0ms (do this by clicking the number and typing 1,000 on your keyboard).

Drag the sustain level all the way down to –inf dB.
Click on the OSC B panel.

Click on the level knob and enter -5.0 on your keyboard to bring the volume of this OSC up to -5.0dB. Pretty annoying, huh? Let’s fix it by using our ADSR options in the middle panel for this OSC.
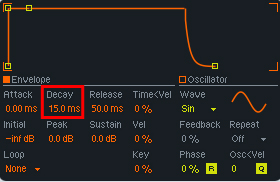
Start by changing the decay to 15.0ms.
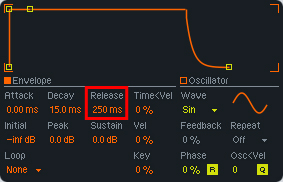
Set the release to 250ms.
Set the sustain to -35dB.
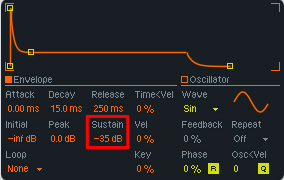
Now it sounds a lot more like a kick drum. Just a couple more steps.
Locate the Global shell on the Operator and click it.

Set the volume knob to 0.0 dB.

Since drums are monophonic, in the middle panel, change the Voices parameter from 6 to 1.
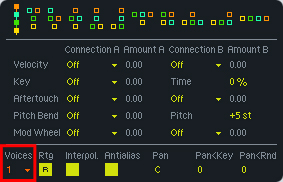
So, with a couple simple sine waves, we were able to emulate a sound close to an 808 hum drum kick. Blending in the second sine wave helps add some attack to the sound, while the first helps round out the tone.
The Snare Drum

Let’s start off by creating another MIDI channel, double clicking the first empty clip slot, and programming this pattern:
Of course, add the Operator to the new MIDI channel.
Again, start off by selecting OSC A’s panel.
In the middle panel, change OSC A’s waveform from a sine wave, to white noise.
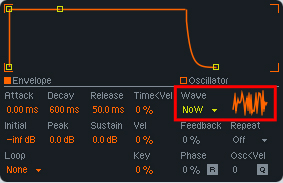
Set the decay to 300ms and the sustain to –inf dB.
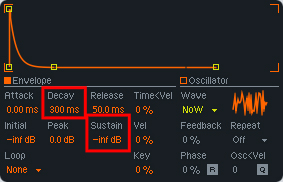
Think of this as our “chain” at the bottom of the snare drum.
Back to the OSC A panel, change the volume to -25dB. This will help blend it with OSC B.
Again, locate the global shell.
Locate the algorithm panel on top of the middle section. Select the last algorithm.
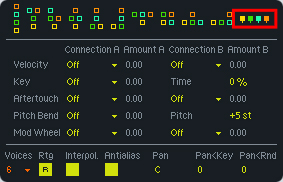
While in the global panel, change the level to 0.0dB as well as the voices to 1.
Select the OSC B panel and set the level to 0.0dB.

In the middle panel change the decay to 100ms and the sustain to -60dB.
The sine acts as the “drum head” giving a tone and shape to the sound, while the white noise acts as the chain beneath the snare. Blending the two gives us a class drum machine snare sound.
The Hi-Hat
This is definitely the easiest of the 3 drum sounds to program. It’s simple white noise with minor adjustments to OSC A’s ADSR.
Load up another MIDI channel and double click to add another 1 bar MIDI loop. Program this sequence of 1/16th notes into the piano roll:
Drop another Operator synth on the new MIDI channel.
In OSC A’s middle panel,change the waveform from a sine wave, to white noise.
In the middle panel of OSC A change the decay to 100ms, the release to 90ms and sustain to –inf dB.
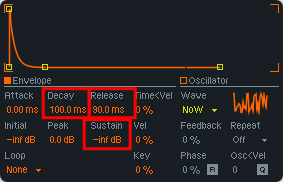
Back to the Global shell, bring the level down to -20dB and in the middle panel change the voices to 1.
Now you have a hi-hat that blends perfectly with the rest of our drum sounds.
Operator? Drums Please
So here is a great introduction to programming synthetic drum sounds from scratch. Try experimenting with other drum sounds (toms and crash cymbals).
I hope that by following these examples, it will lead more people to experiment with their own Operator synthesizer patches in Ableton.
Original post source here

