This post covers creating a nice gating effect In FL Studio with the envelope controller.
Gating is a technique of fragmenting sustained sounds into short, percussive bits. It is a very common technique in dance music. Many modern soft synths allow for the most dramatic trance gates, but you can also create awesome gating effects with FL Studio’s existing tools. For example, you can automate channel volumes using automation clips. Another, less known method is based on the Fruity Envelope Controller, which is a versatile plug-in that allows for attention-grabbing gating effects.
The Fruity Envelope Controller does not produce sound, but generates an automation signal that can be linked to automatable parameters, such as the volume of a generator channel. Its automation envelopes are triggered by note events in the piano roll.
Step 1: Add the Fruity Envelope Controller
Start with an empty project and add the Fruity Envelope Controller to your project by choosing Channels > Add one > Fruity Envelope Controller from the main menu. The controller is added and the main window opens.
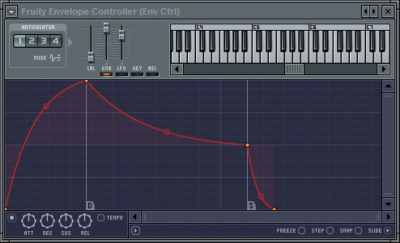
The main part of the window is reserved for the envelope editor. It is similar to what you see in other plug-ins in FL Studio.
Step 2: Create a sequence
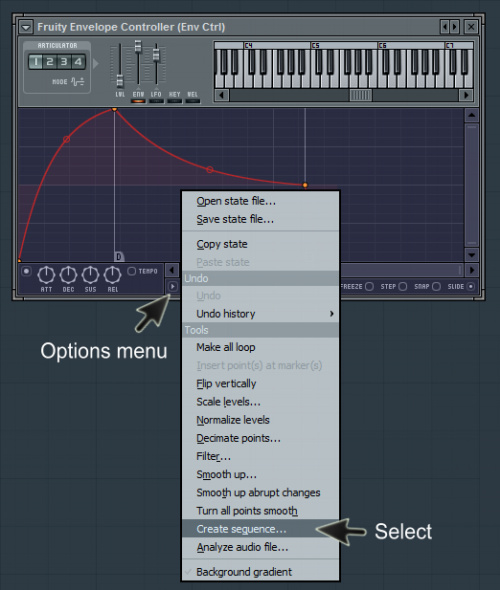
Create a sequence by choosing Create sequence in the options menu.
This opens up the Create sequence dialog.
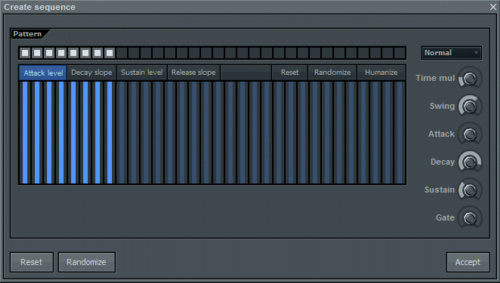
The envelope editor now shows an envelope with a repetitive pattern.
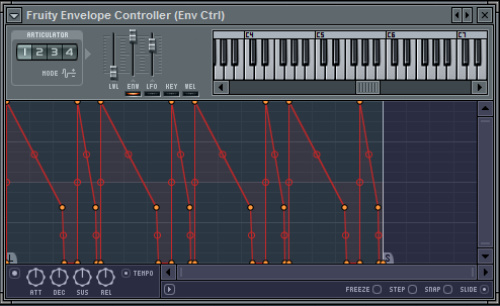
Before we are going to tweak the pattern we will first link it to the channel volume a generator channel.
Click the Accept button on the Create sequence dialog.
Step 3: Make some music
Add a generator/plug-in of your choice to the step sequencer by choosing one from Channels Add one in the main menu.
Next, add some notes to the piano roll of your new channel. What you want at this stage is sustained sounds, which I achieved by using a good reFX Nexus preset (a pad) and creating a simple progression with long stretched notes.
Your step sequencer should now look similar to the one shown below.

Step 4: Link to controller
Next we will link the controller signal from our Fruity Envelope Controller to the channel volume of our generator channel.
Right-click the channel volume and choose Link to controller in the menu.
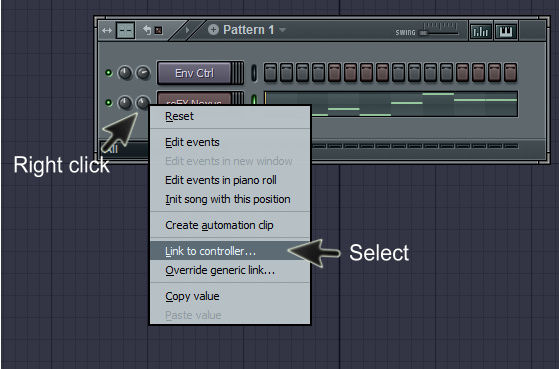
In the Remote control settings dialog, choose Env Ctrl (Env Ctrl) – Art 1 from the Internal controller dropdown box.
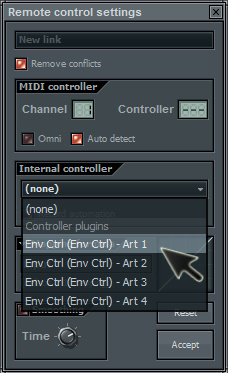
Click Accept in the Remote control settings dialog.
We have now linked the controller signal to the channel volume.
Step 5: Trigger the automation envelope
The interesting thing with the Fruity Envelope Controller is that its signal is triggered by notes in the piano roll. If there are no notes, there is no automation signal.
Try this out by playing what you have so far. If you followed the steps in this tutorial you will notice that the channel volume of your generator channel – the one with your simple melody/progression – is constant.
Copy the notes from your melody/progression to the channel with the Envelope Controller.

After you have done that, play your melody/progression again. The channel volume now follows the envelope that we created in the Fruity Envelope Controller. We have our gated synth!
Note that the automation envelopes are triggered regardless of the pitch of the notes in the channel with the Fruity Envelope Controller. It is possible to trigger different envelopes depending on the pitch of the note, but that is beyond the scope of this tutorial.
Step 6: Use a different pattern for triggering the automation envelope
To understand the effect of the notes in the controller channel, program a different pattern. In the illustration shown below you can see that I created a pattern with many short notes.

The result is quite different from what you hear in step 5.
To summarize, the notes in the piano roll control when the automation envelope is triggered. The envelope itself controls the automation signal level.
Step 7: Change the automation envelope
By manipulating the envelope in the Fruity Envelope Controller – while you play your sounds – you can ‘compose by ear’ until you reach that great, attention-grabbing gating effect everyone will notice.
Open the Fruity Envelope Controller and choose Create sequence in the options menu (see also step 2).
In the Create sequence dialog, play around with the parameters on the right (while you play your pattern).
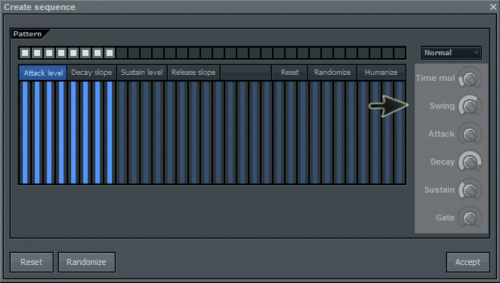
It is beyond the scope of this tutorial to give an in-depth explanation of every feature, but you will quickly find out that you can create some really awesome and dynamic gating effects by manipulating those parameters.
Step 8: Play, practice and learn
This step is entirely up to you. I have only scratched the surface of the Fruity Envelope Controller, but hopefully it inspires you to start using this great little tool in your next compositions.
Happy composing!
Website: www.midichords.com

